LoRa Solar Weather Station Part 2: LoRaWAN Gateway and Client Configuration
- 5 minutes read - 1013 wordsThis is the second post about my hobby weather station build, this time describing the LoRaWAN elements.
I opted to install a public The Things Network (TTN) gateway outside on my shed so that other users around me can also use this gateway to communicate with TTN. While I could have deployed the whole LoRaWAN stack locally (gateway, network server, join server, application server, etc on a platform such as a Multitech Conduit or with Chirpstack), I thought this would be a good opportunity to give operating a public TTN gateway a spin.
LoRaWAN Gateway
Inventory of parts:
wAP LoRa9 kit (RBwAPR-2nD&R11e-LoRa9) https://solimedia.net/product/wap-lora9-kit/
U.fl - SMA female pigtail https://solimedia.net/product/acsmaufl/
Taoglas Barracuda OMB.915.B03F21 902-915MHz Antenna
Omni-Directional Radiation Pattern, Collinear 3.5 dBi Peak Gain
https://www.taoglas.com/product/barracuda-omb-915-b03f21-915mhz-3dbi-omni-directional-outdoor-antenna/
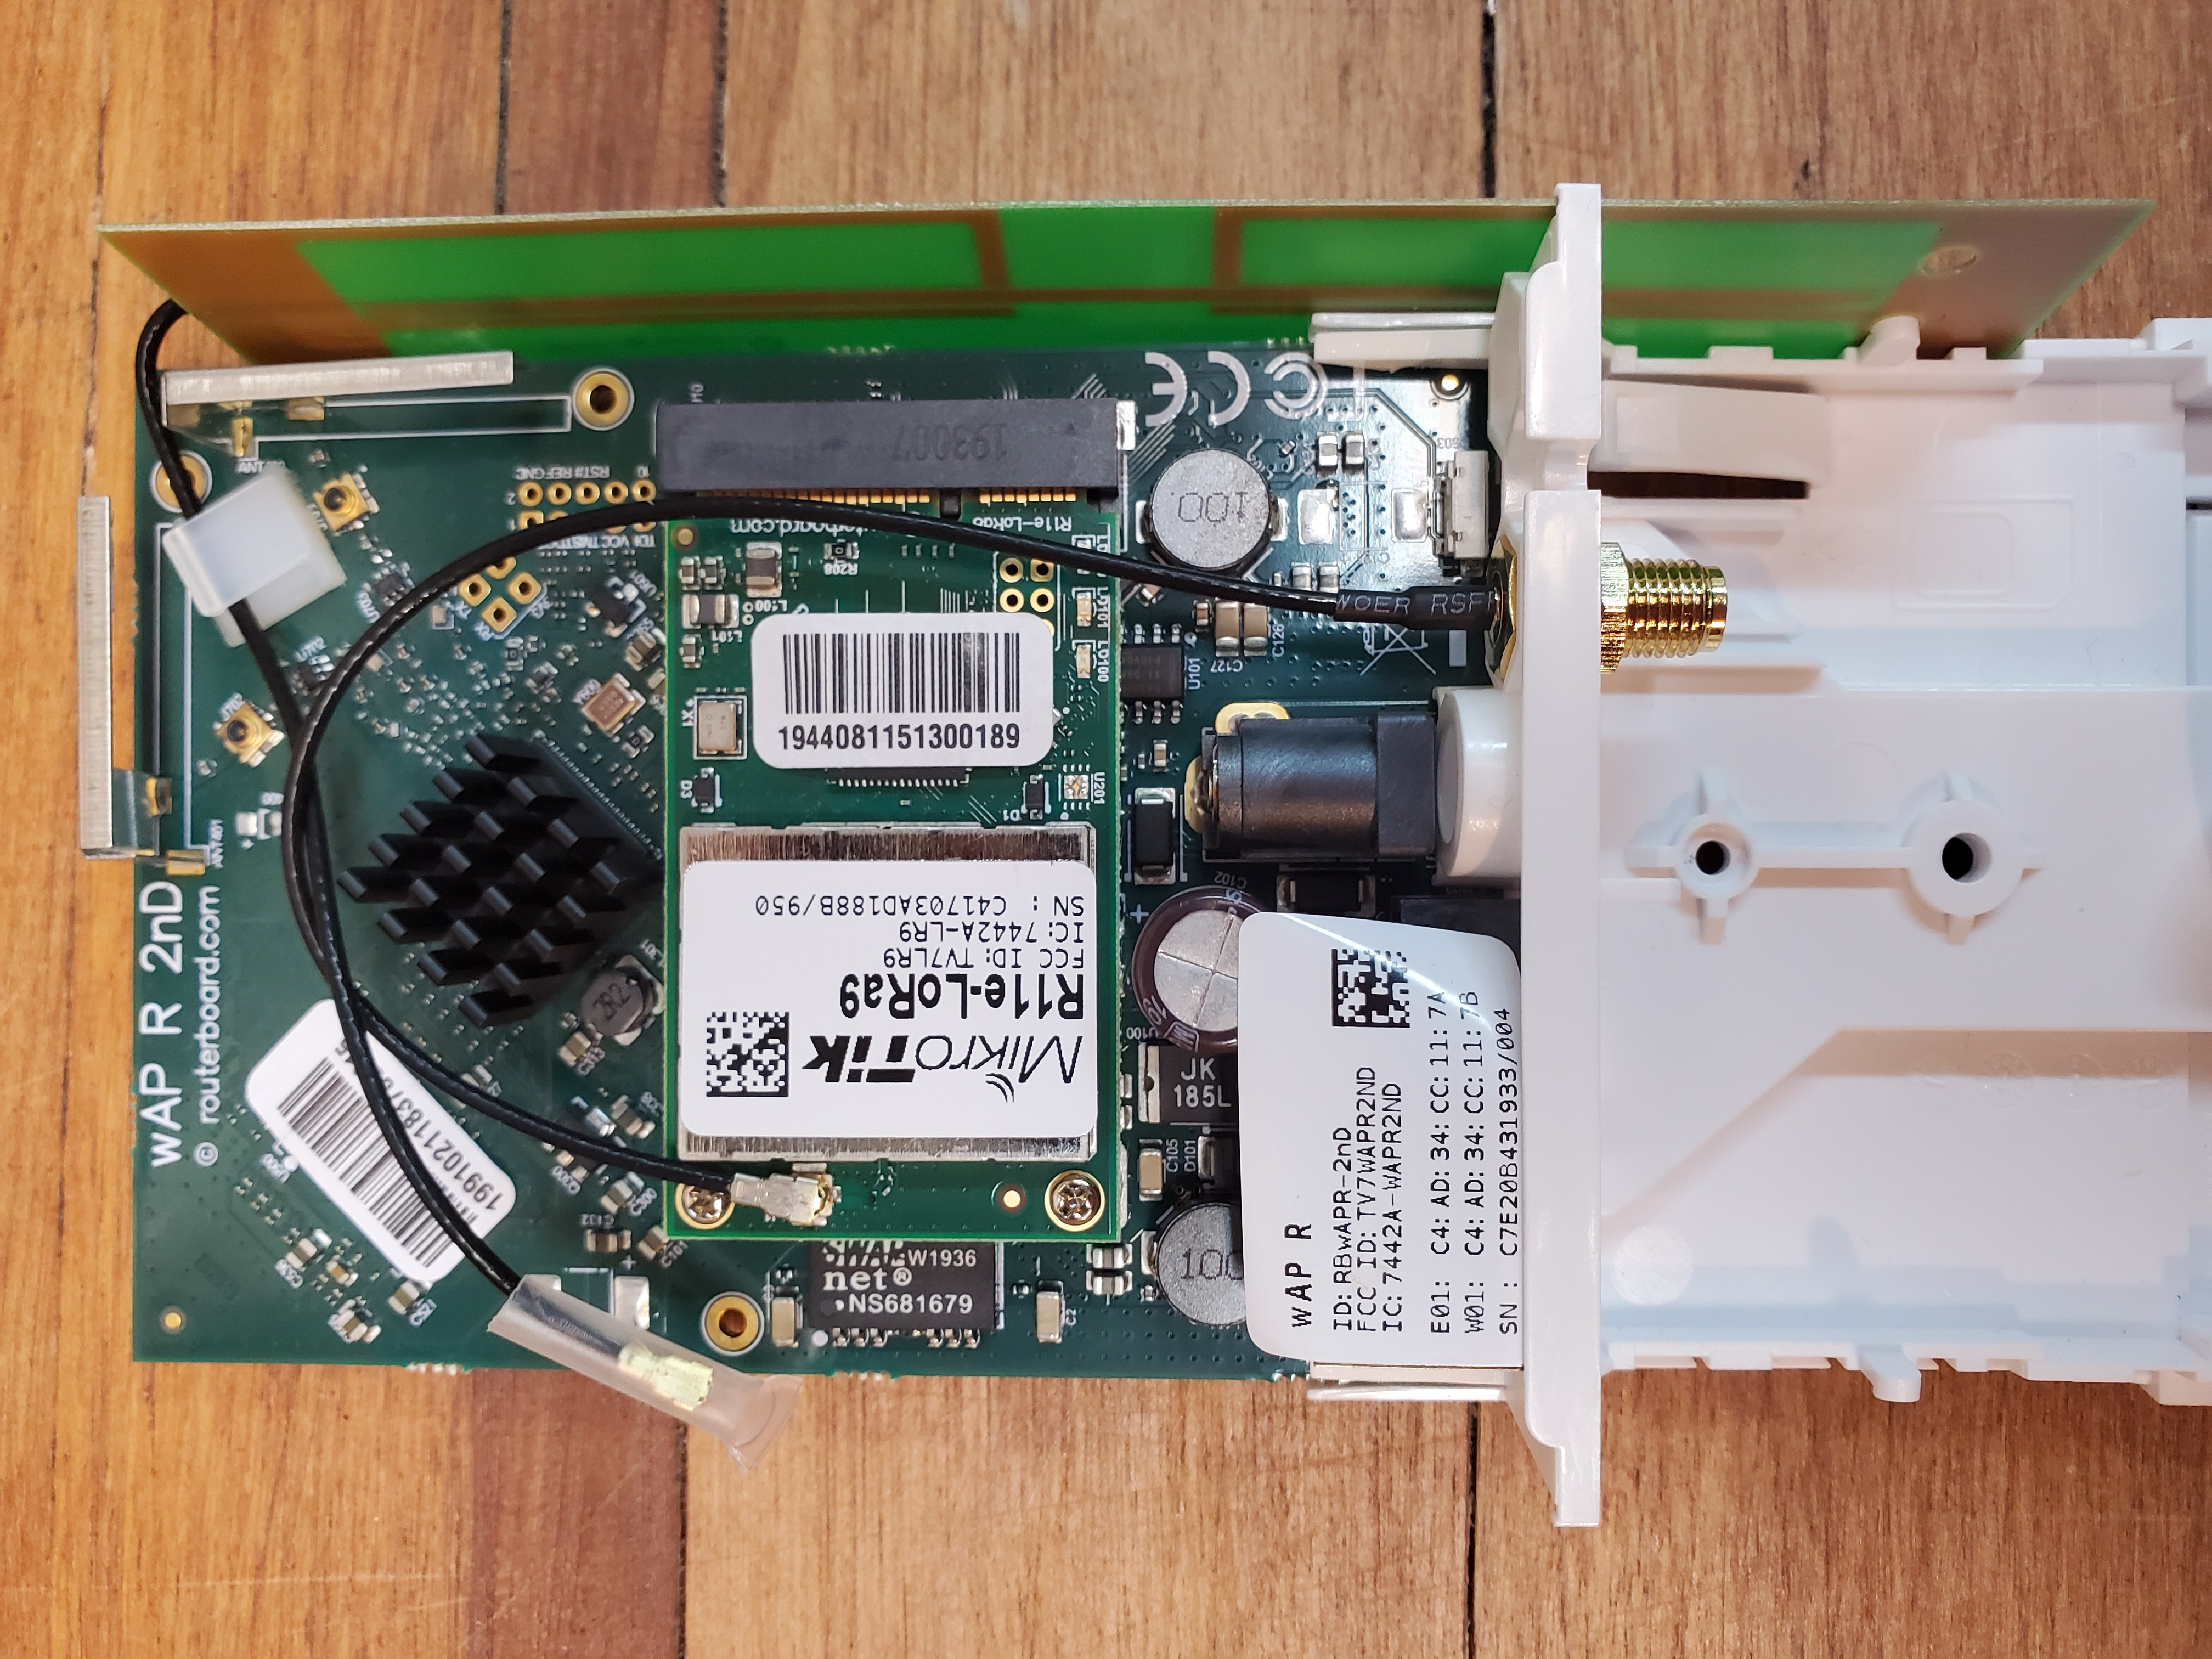
I’m a huge fan of Mikrotik equipment and use their LTE / WiFi / LoRa products at my current day job. This project uses the very inexpensive wAP LoRa9 kit, which is a standard wAP access point with a mini PCIe card slot fitted with a LoRa9 radio. Note: I’m not using any WiFi functionality in this project. Included is an internal 2 dBi PCB 915 MHz LoRa antenna, but for our purposes we want to use an external antenna for better reach. A U.fl to SMA whip brings out the internal U.fl connector from the LoRa radio to an external SMA connector where the external antenna is attached via SMA to N-male 50Ω LMR-100 transmission line. The Taoglas Barracuda 915 MHz antenna is a reassuringly expensive commercial antenna, used here only for testing (it belongs to my employer). If I were paying for the LoRa antenna myself, I would opt for the Mikrotik TOF-0809-7V-S1 at a more reasonable USD$49.00.
Gateway Configuration
LoRaWAN gateways have minimal software configuration requirements. Here is the TTN public config from my Mikrotik gateway:
/lora servers
   add address=us-west.thethings.network down-port=1700 name=TTN-US-WEST up-port=1700
/lora
   set 0 status="Enabled" name=PhischTankLoRa1 servers=TTN-US spoof-gps=49.XYZ/-97.XYZ/XYZm channel-plan=us-915-2 antenna-gain=3dB network=public
(Note that you’ll need to have the RouterOS lora package installed. See the “extra packages” bundle for your version of RouterOS if there is no Lora section in your router’s configuration.)
All we need to configure is the DNS name of the TTN US-West address, the up and down UDP port (1700 for both) and (optionally) the GPS coordinates of the gateway (this unit doesn’t have a GPS receiver so we use the spoof-gps option to pretend). In Canada, TTN uses the US 915 channel plan, sub-band 2. Setting the antenna gain assures that we don’t exceed the maximum Effective Isotropic Radiated Power (EIRP) for our regulatory domain.
RouterOS also needs to be configured with a DNS server in order to resolve the DNS name of the TTN server, and it also needs IPv4 connectivity to the commercial internet. I have not yet tested with IPv6 as RouterOS version 6.x does not seem to strive for feature parity between IPv4 and IPv6. IPv4 connections to TTN servers from behind NAT work perfectly fine.

wAP LoRa9 inside

LoRa gateway outside on my Shed
LoRaWAN Client Configuration
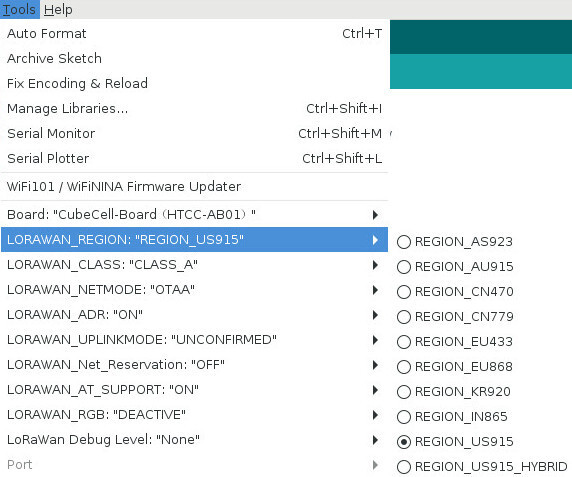
There are not many items to configure on the client side, but they are important to get right. I have chosen to use the pre-built LoRaWan_APP example Arduino sketch from Heltec as my starting point, and many of the LoRaWAN options are set right in the Arduino IDE’s “Tools” menu.

Arduino IDE Tools Menu with LoRaWAN Options
Some menu configuration options are:
- LORAWAN_REGION: The regulatory region and frequency in use. Most LoRa chips/modules can only operate within one frequency range. This MUST match that of your gateway and network server.
- LORAWAN_CLASS: Sets the device class. Battery-powered devices are almost always
Class Adevices. - LORAWAN_NETMODE: “OTAA”, or Over-The-Air Activation, is the mode used to join the network. OTAA is almost always preferred over “ABP”, or Activation By Personalization in production.
- LORAWAN_ADR: Adaptive Data Rate setting (On/Off): Allows the network server to send a MAC downlink message to the node to modify its subsequent sending parameters (TX power and/or data rate) to optimize battery power if there is sufficient link budget to allow for this. (E.g., the network server receives messages from this node and determines that the node is coming in “very loud”. The network server can then suggest the node decrease its transmit power and/or increase its data rate, thereby reducing its time on air [ToA].)
- LORAWAN_UPLINKMODE: Allows the request for uplinks to be acknowledged with an ACK downlink. This is almost never a good idea due to duty cycle / ToA limitation.
- LORAWAN_Net_Reservation: This appears to be a Heltec thing. I believe it allows the CubeCell to retain its session keys between restarts to avoid re-JOIN overhead between boots.
Some LoRaWAN parameters may be specified within the Arduino code itself:
- devEui: A globally unique device identifier assigned to this node. Heltec LoRa modules don’t seem to have a DevEUI specified when they’re shipped (unlike devices from Multitech, for example).
- appEui: The unique application ID in the TTN network (assigned by TTN).
- appKey: Application key assigned by TTN.
userChannelsMask: TTN uses sub-band 2 in the US915 region, which we need to set with this parameter, e.g.
uint16_t userChannelsMask[6]={ 0xFF00,0x0000,0x0000,0x0000,0x0000,0x0000 };
Finally, other LoRaWAN parameters seem deeply hidden in the Heltec library code, namely those who have the most direct influence on both battery life and communications range:
- Default Data Rate: The default data rate seemed to be set to Data Rate 5 (DR5) deep within the
LoRaWan_APP.cppcode. Since DR5 is reserved for future use as specified in the LoRaWAN regional parameters version 1.0.2 specification for US915, I had to modify this to DR3 since it was most appropriate for my uses (I had PLENTY of link budget). - Transmit Power: I’ve given up on finding how to tune this since the max EIRP algorithms and regional parameters are intricately-woven black magic within the Heltec C++ libraries. This is a good argument to use Adaptive Data Rate with stationary devices: Set a reasonable default data rate, let the Heltec library use max TX power to start with, and let the TTN network server crank back power via ADR MAC commands.