LoRa Solar Weather Station Part I: Station Hardware
- 7 minutes read - 1394 wordsThis is the first of many posts describing my hobby weather station build. The goal in building this project, apart from having a nifty weather dashboard with data fresh from my back yard, was to gain more knowledge about LoRaWAN, The Things Network, Mikrotik’s LoraWAN hardware, Heltec CubeCell dev boards, environmental sensors, InfluxDB, Node-RED, Grafana, and lots more. The station needs to be solar powered, maintenance-free, reliable, and operate in our Canadian prairie weather between -35℃ and 35℃ without missing a beat.
Here is a look at the contents of the main enclosure:
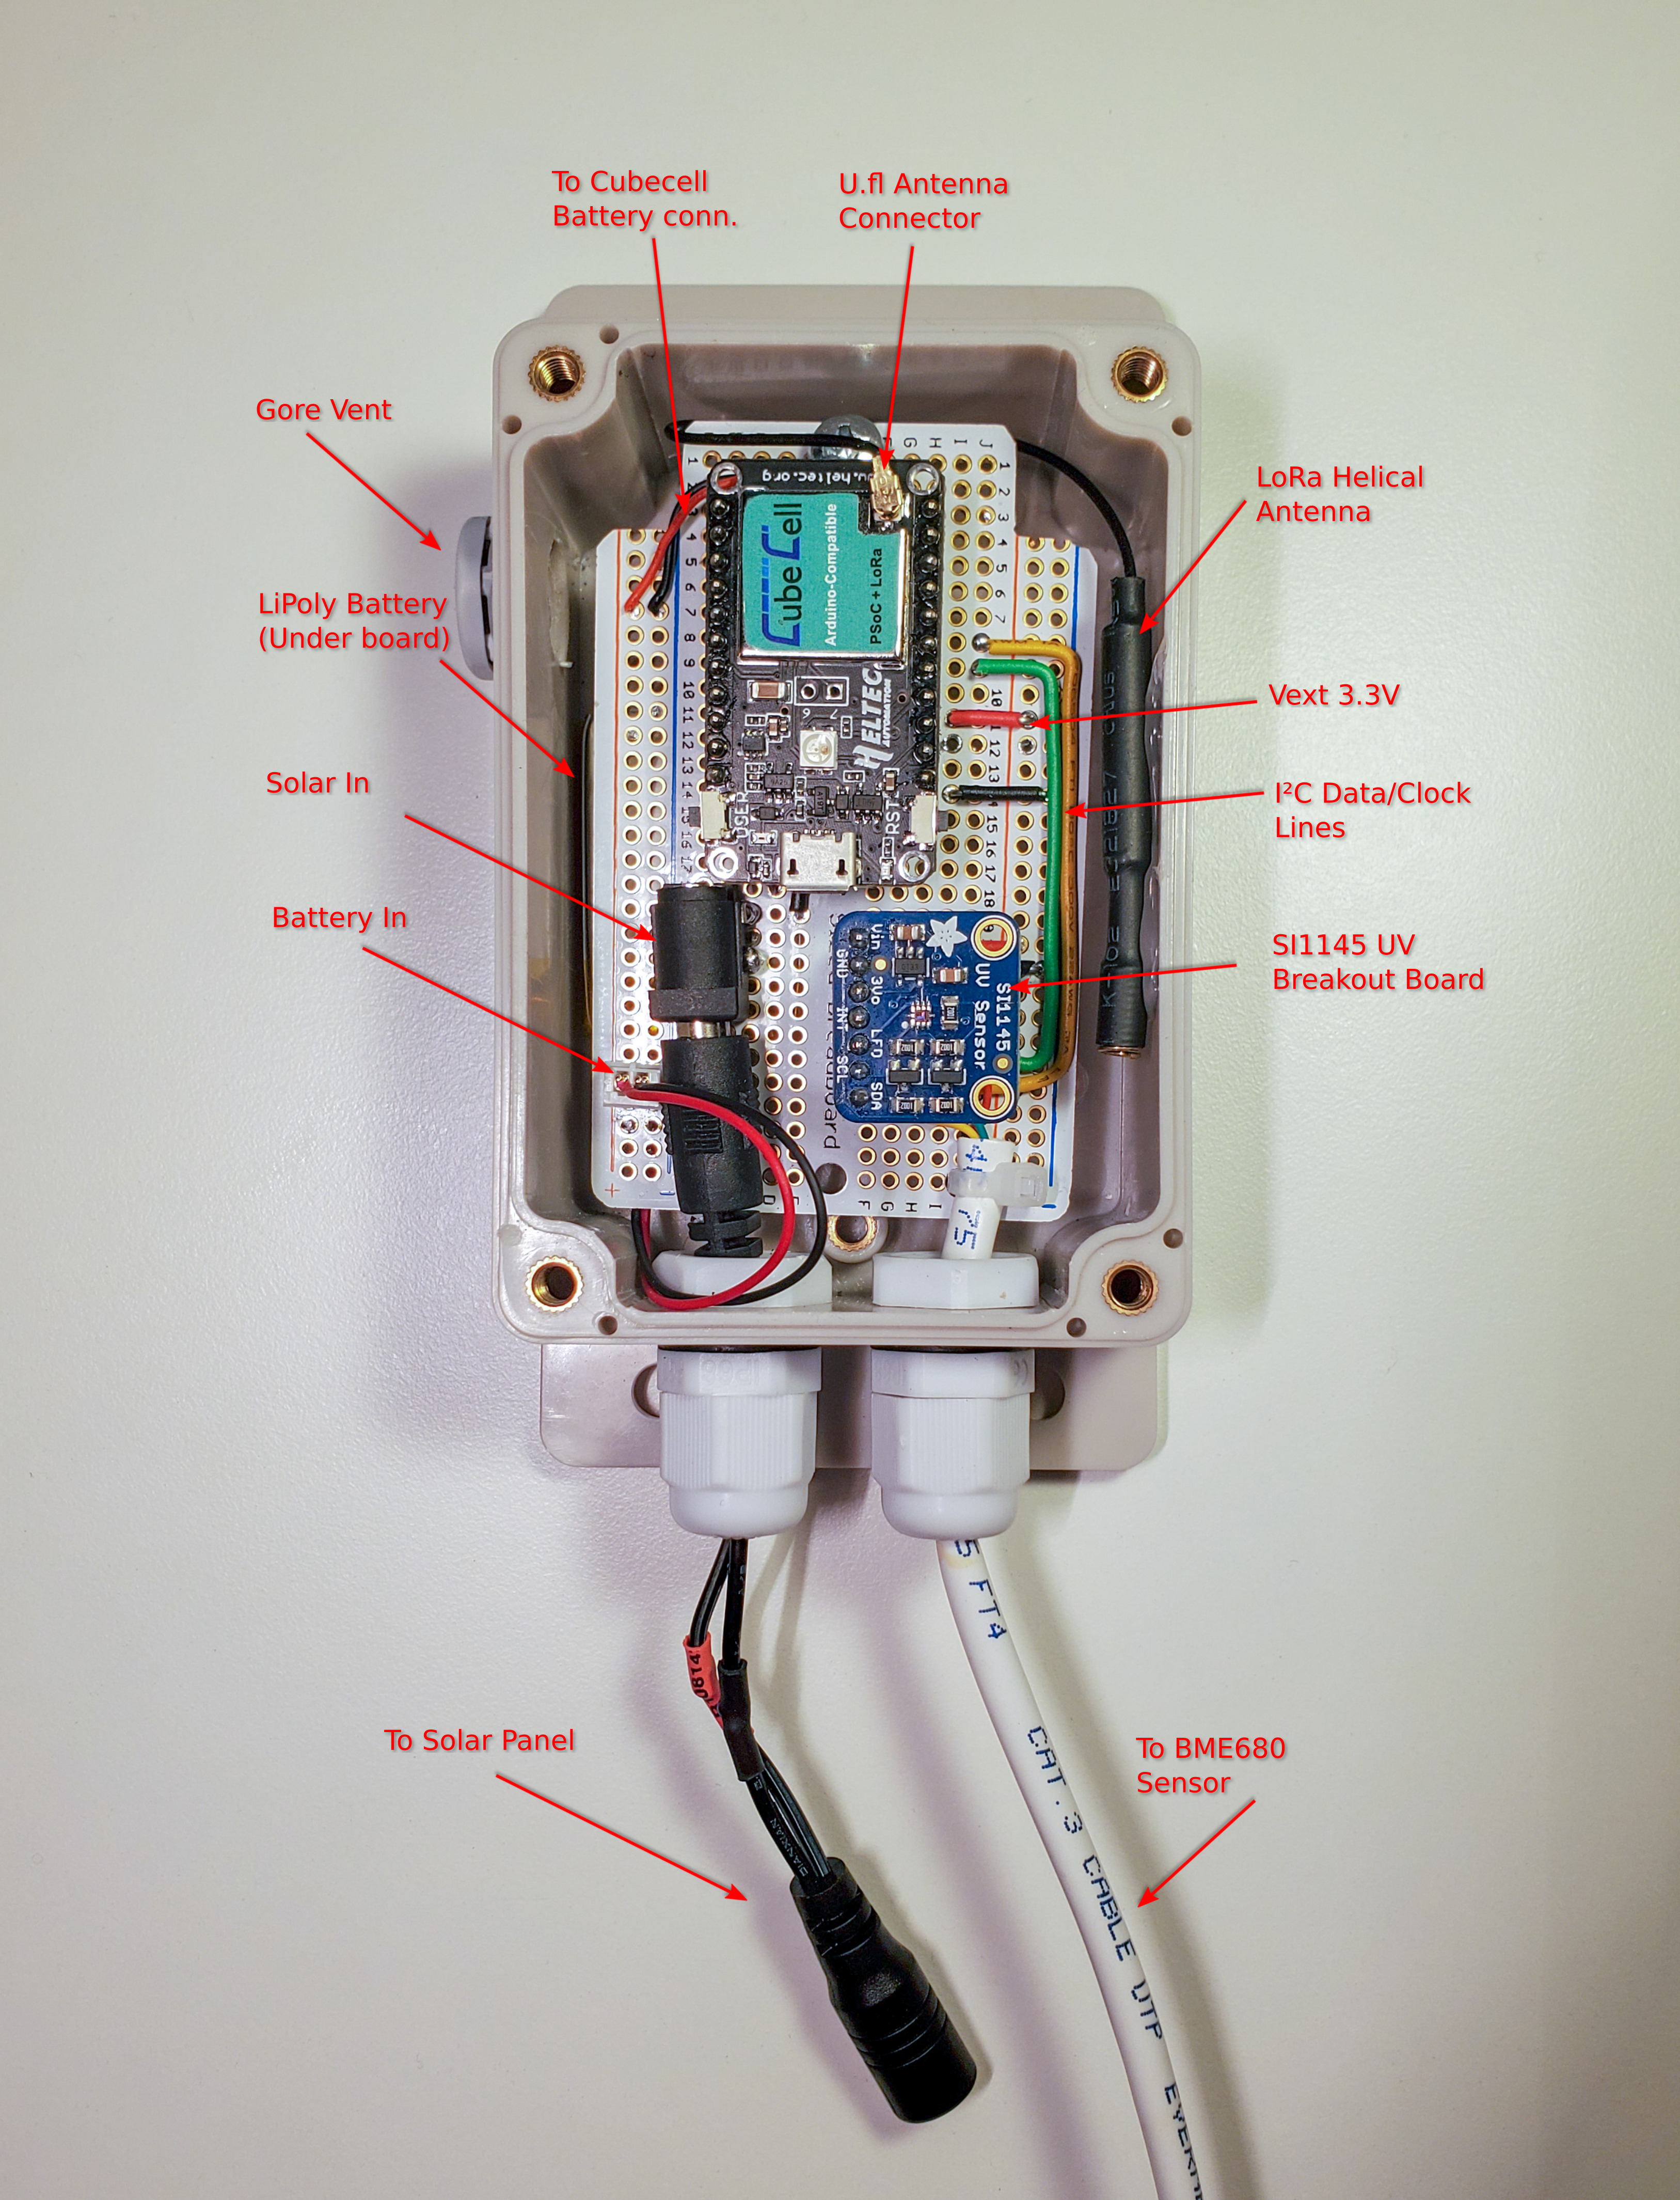
Enclosure contents, annotated
Heltec Cubecell
This project is built around the Heltec Cubecell HTC-AB01 dev board. The features used in this project that make the board attractive are:
- Very low power consumption during deep sleep (which is most of the time)
- LoRaWAN 1.0.2 compliant Semtech SX1262 chip
- External LoRa antenna via U.fl connector
- Onboard solar energy managemnt system
- Onboard lithium battery management
- I²C support for peripheral and and intra-board communications
- Analog-to-digital converter (ADC) for battery voltage measurement
- Software controllable regulated 3.3V power for sensors
- Arduino compatible
Sensors
Both the SI1145 Digital UV Index / IR / Visible Light and the BME680 Temperature, Humidity, Pressure and Gas sensors are Adafruit pre-assembled breakout boards. This makes is easy for makers to simply provide power and I²C clock / data for these to work.
The UV sensor is mounted inside the enclosure with the Cubecell but on extra long male headers to bring it close to the transparent polycarbonate lid in order to maximise its view of the sun. The polycarbonate does not appear to filter the particular wavelength of UV measured by this sensor and seems to have no measurable effect on the readings based on my testing.
The BME680 breakout board is housed within the radiation shield in order to expose it to the ambient air while protecting it from direct sun and moisture. It is connected externally by 2-pair category 3 cable which is run out of the enclosure through one of the two cable glands. The cable’s conductors are currently soldered directly to the proto board but I would like to replace that connection with a modular connector that is small enough to pass through the cable gland, at ≅ 4.2mm.
Both external sensor breakout boards are powered by the Cubecell’s Vext pin, which provides 3.3V only when enabled. This is done by setting Vext high or low:
// Enable Vext power
 digitalWrite(Vext, LOW);
// Disable Vext power
  digitalWrite(Vext, HIGH);
Both of these breakout boards, like many of Adafruit’s awesome breakouts, are safe to power with 3.3V or 5V because of the included regulation and level-shifting.
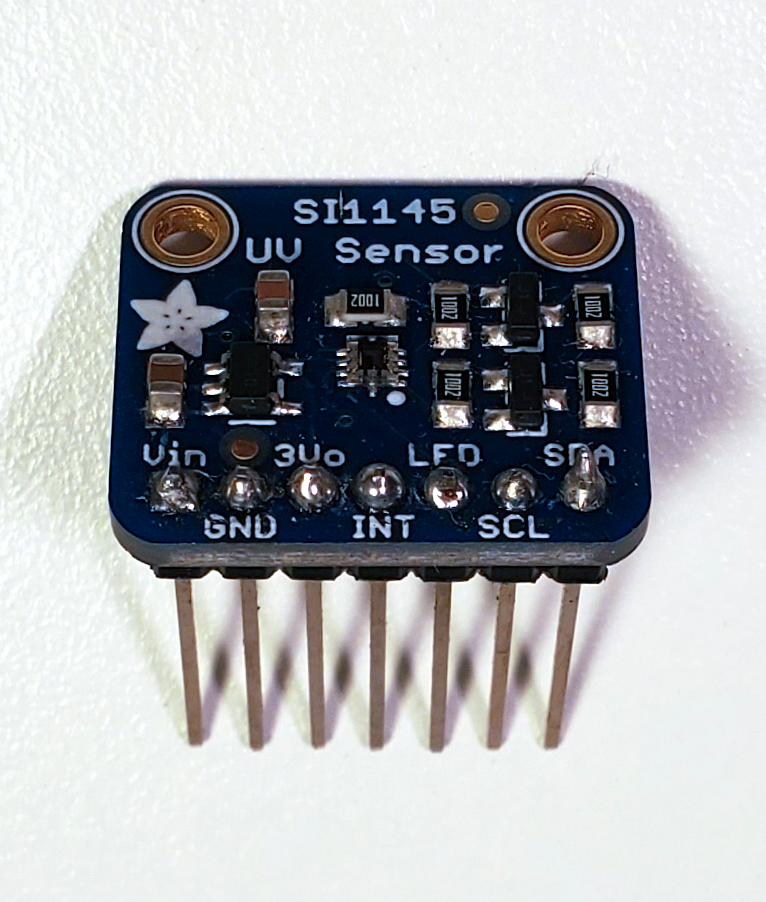
Adafruit SI1145 Breakout Board with long male headers
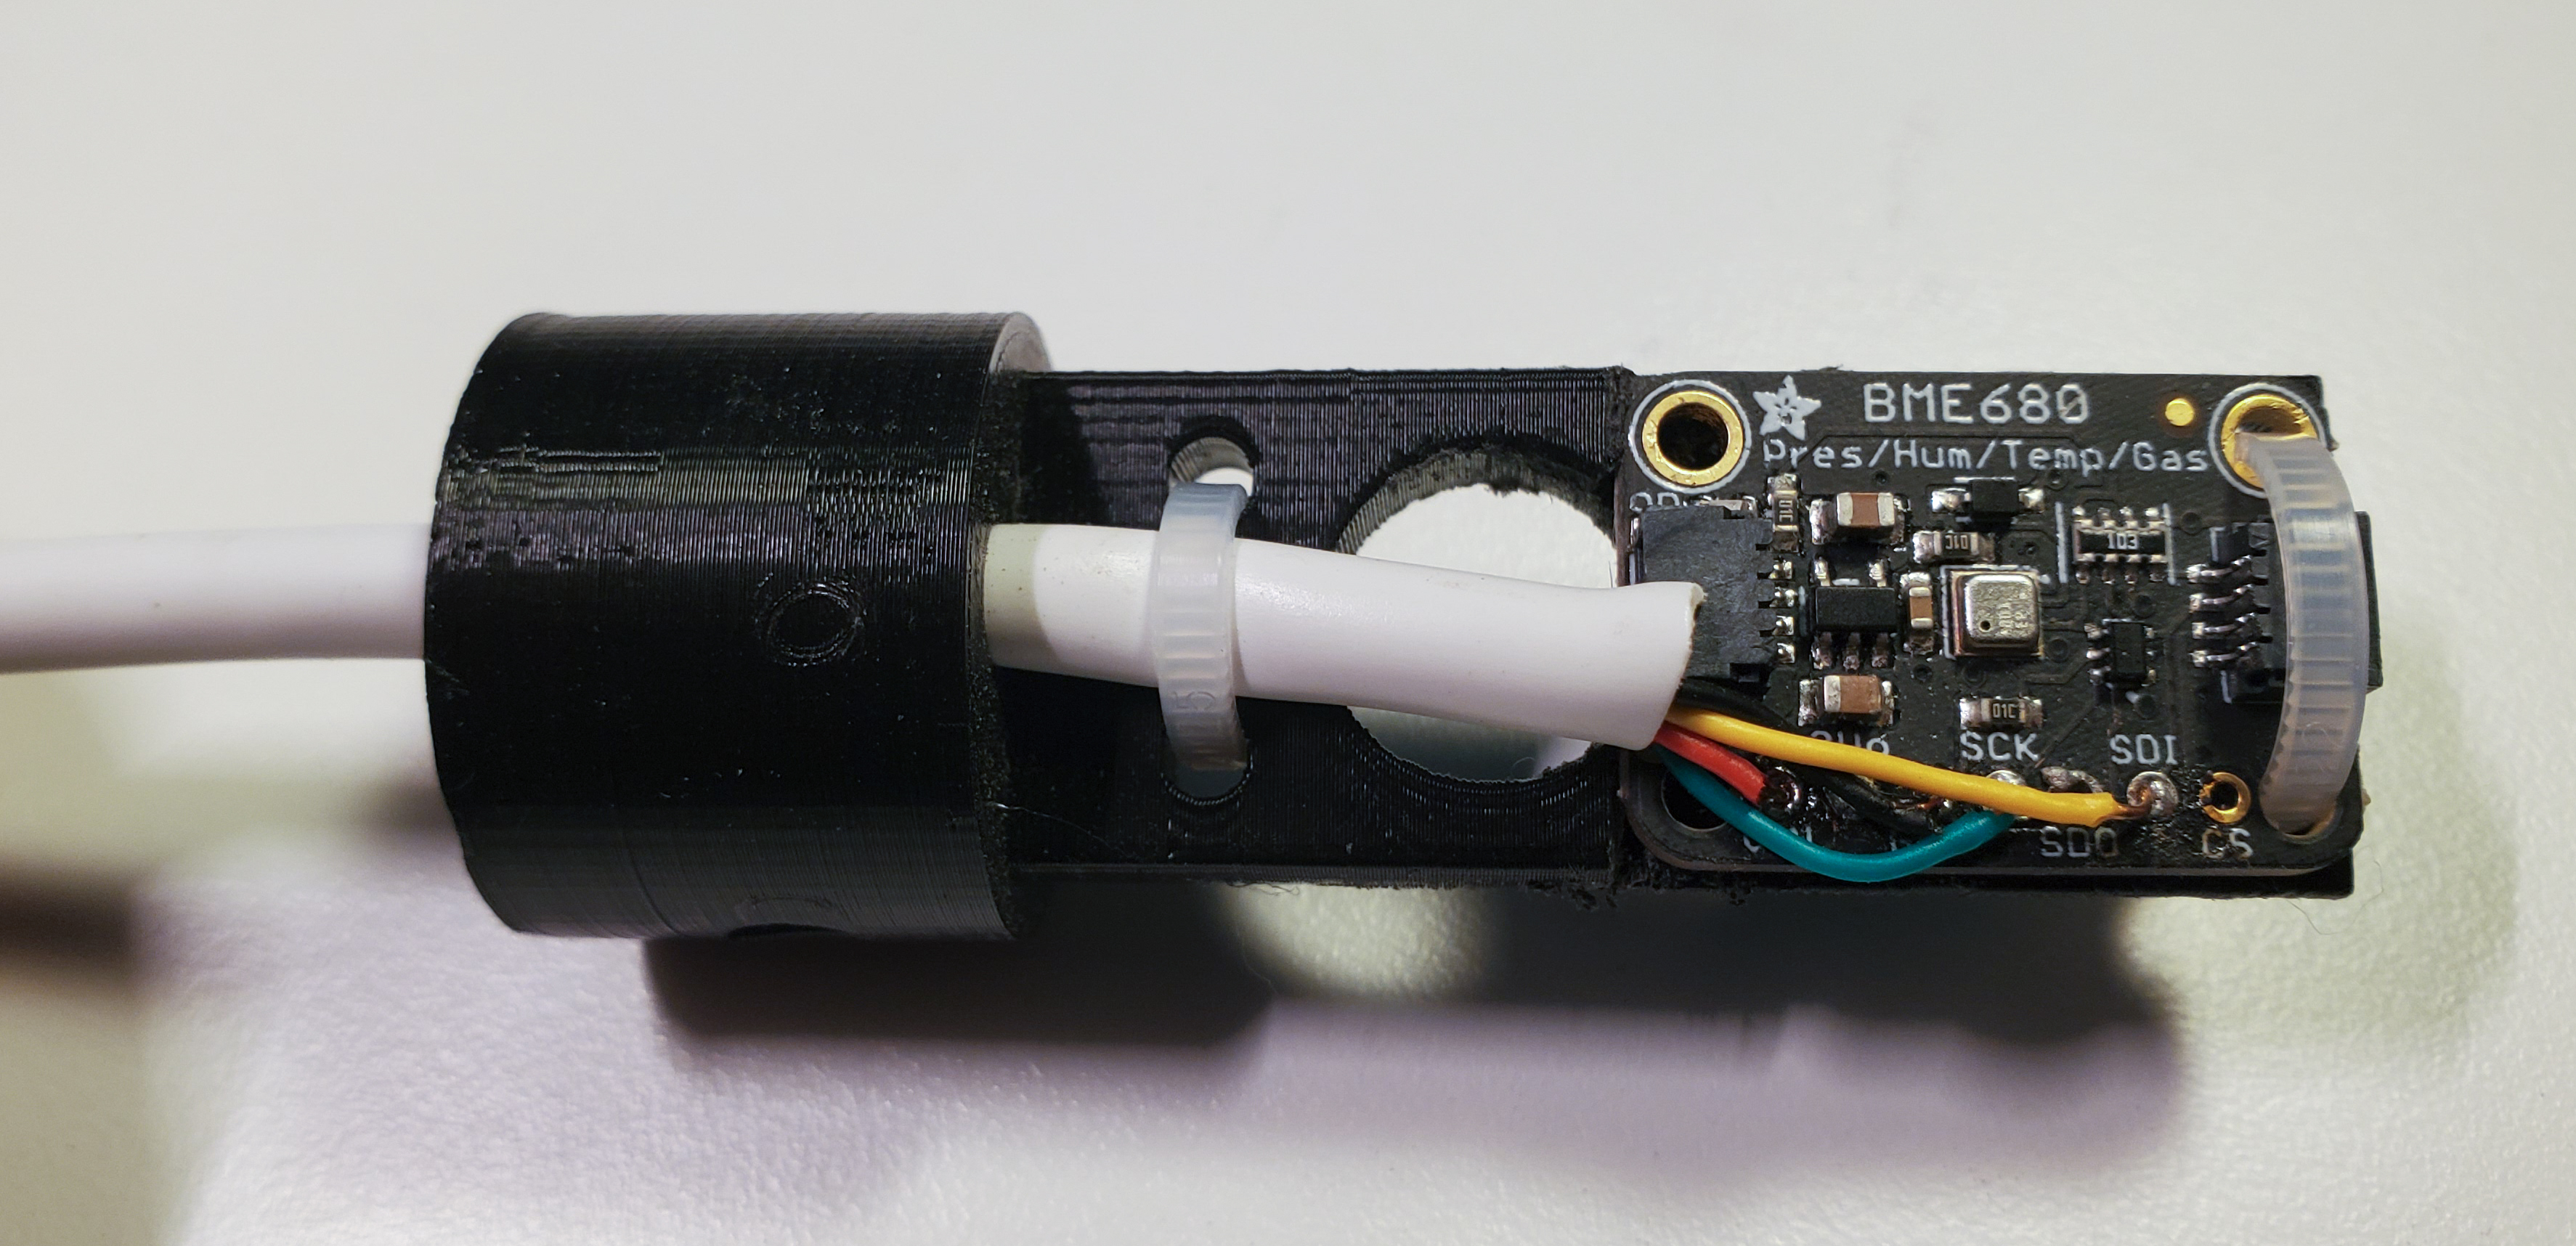
Adafruit BME680 Breakout Board mounted to 3D printed sled for mounting in radiation shield
Assembly
A ½ size Adafruit Perma-Proto board fits nicely with minimal Dremel modification to the weatherproof enclosure I chose. The left power rail is used for battery voltage with a 2mm pitch JST connector to the battery, and a set of power wires up to the Cubecell’s 1.24mm pitch JST SH connector on the Cubecell’s underside. The right power rail supplies 3.3V via Vext to supply the external sensors. A 2.1mm barrel jack is used for the solar power input via VS pin, though I will change this connector down the road to being a panel mount weather-proof connector rather than the janky connector pigtail-throug-the-cable-gland that’s currently in place.
The sealed weatherproof enclosure will tend to trap moisture and cause condensation, so a solution was needed to mitigate this. I have seen other hobbyists use silica gel desiccant packs, but since I want this weather station to be zero maintenance, I opted for a GORE® PolyVent venting solution which allows air flow, and thus humidity, in and out without allowing dust and moisture to pass. We use these M12-sized vents at work which are normally threaded and gasketed. I was able to get my hands on a discarded vent whose threads were cracked, so I simply sawed off the threaded portion and surface-mounted the vent atop a hole drilled into the side of the enclosure using Krazy Glue.
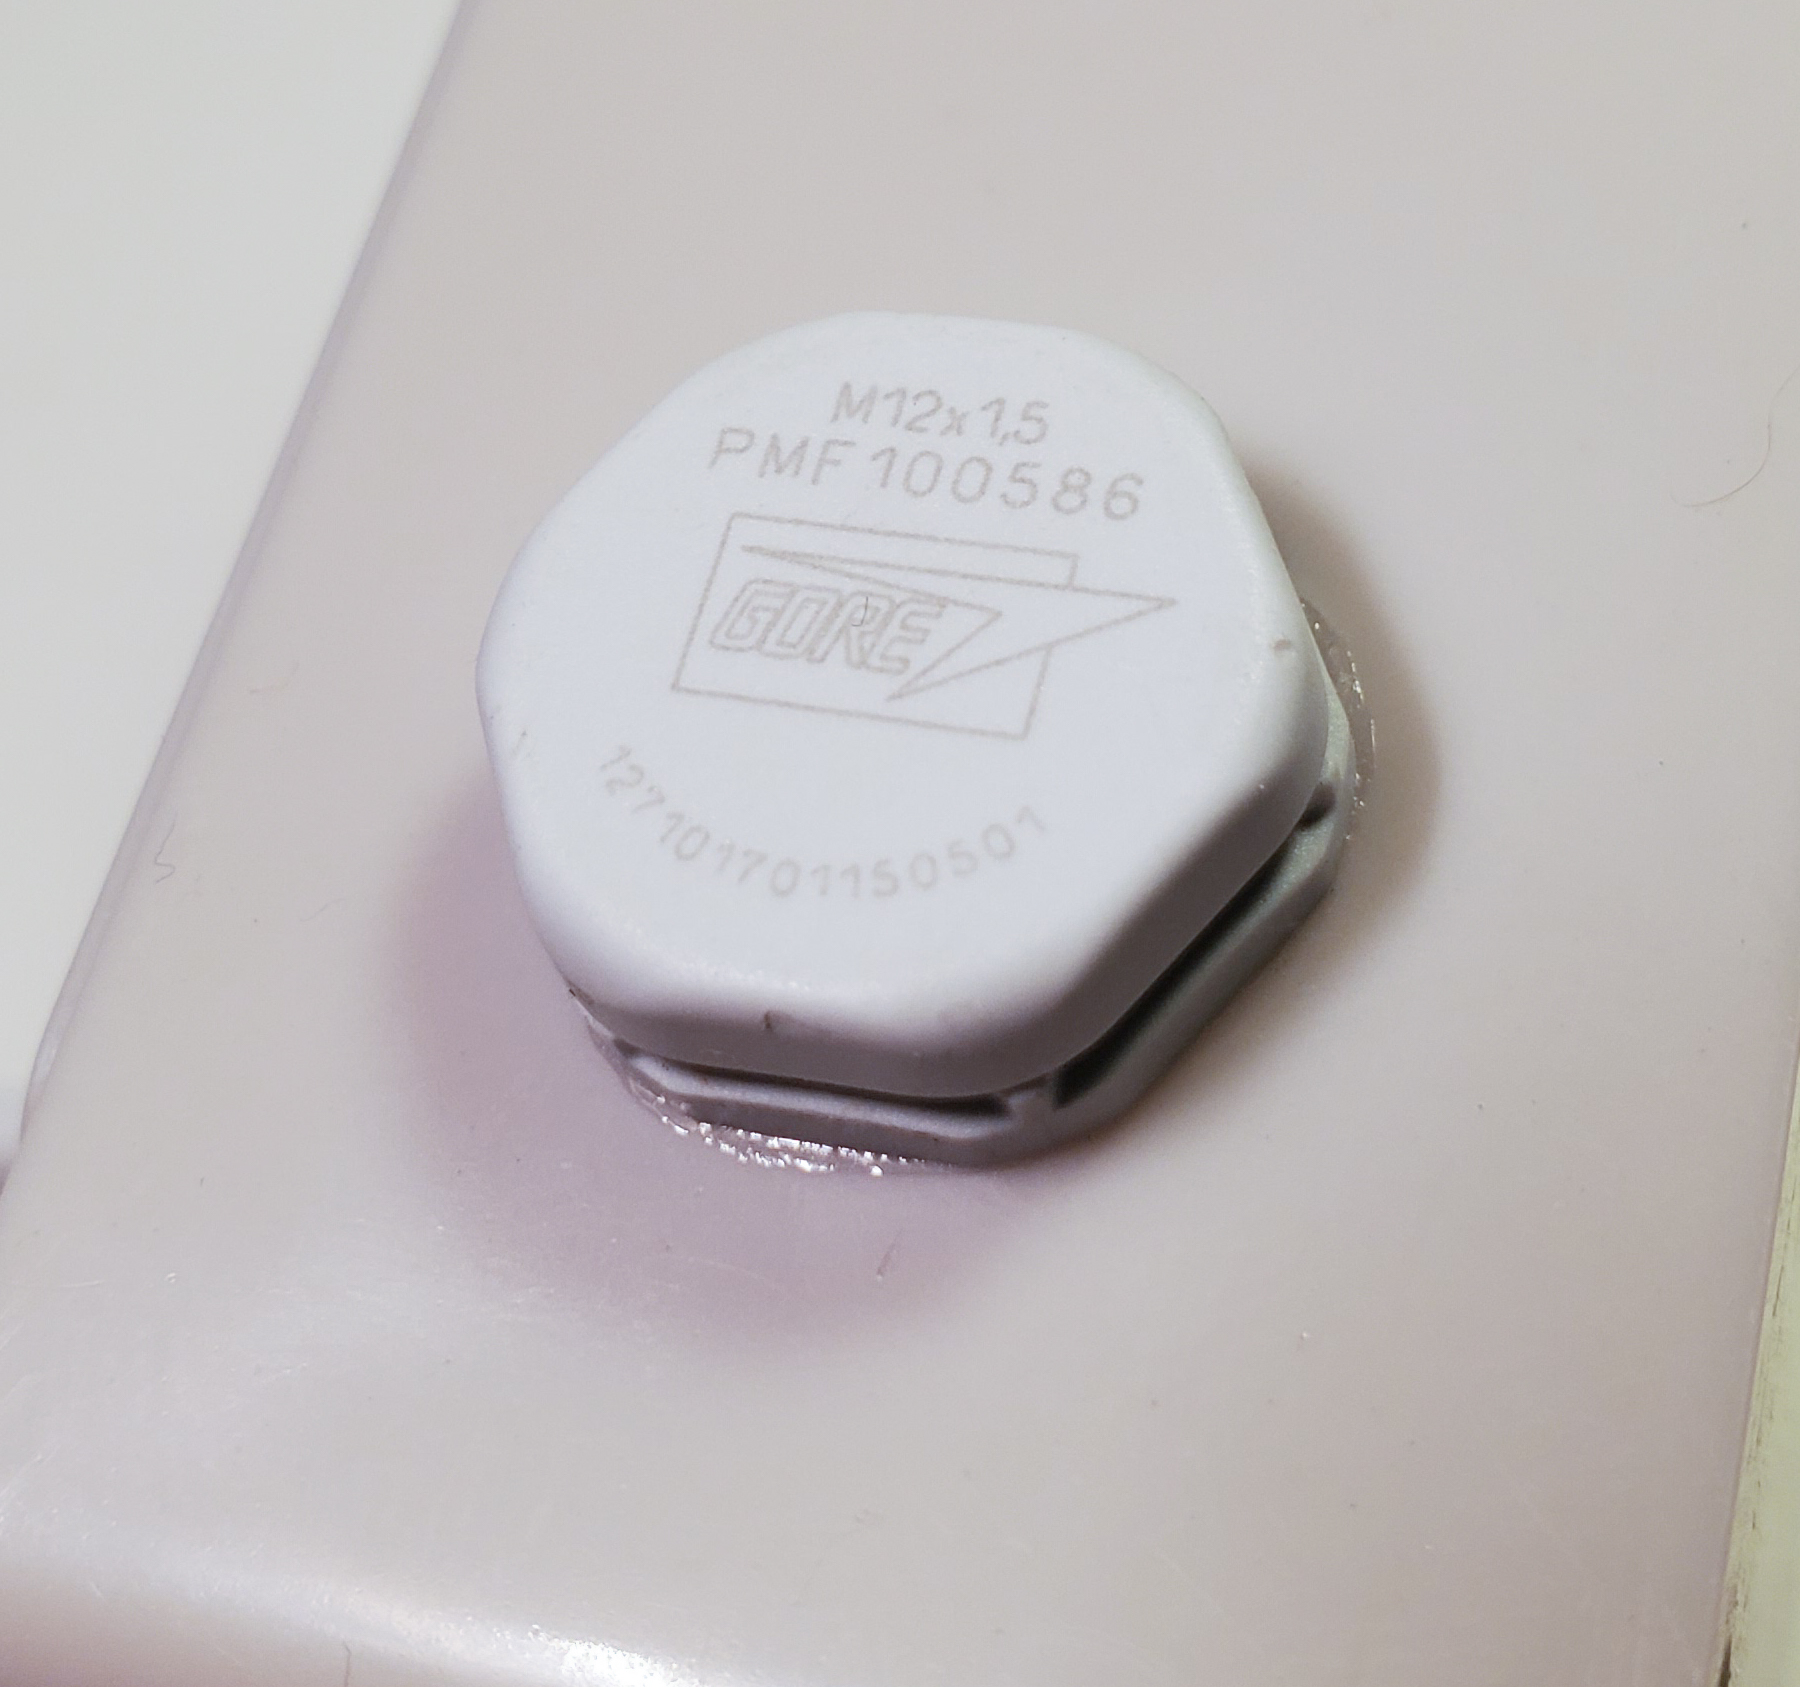
GORE® PolyVent on enclosure side providing oleophobic as well as hydrophobic protection
Radiation Shield
The radiation shield, which houses the BME680 pressure, humidity, temperature, and gas sensor, was 3D printed on a Prusa i3 MK3 printer with black PLA, nozzle temp 200℃. The black parts were then painted white with Krylon ColorMaxx indoor/outdoor semi-gloss. Why did I use black PLA just to paint it white? 1) I had black filament on hand, 2) I’m impatient, and 3) I wanted to watch the printer go wrrrrrrrrr RIGHT NOW.
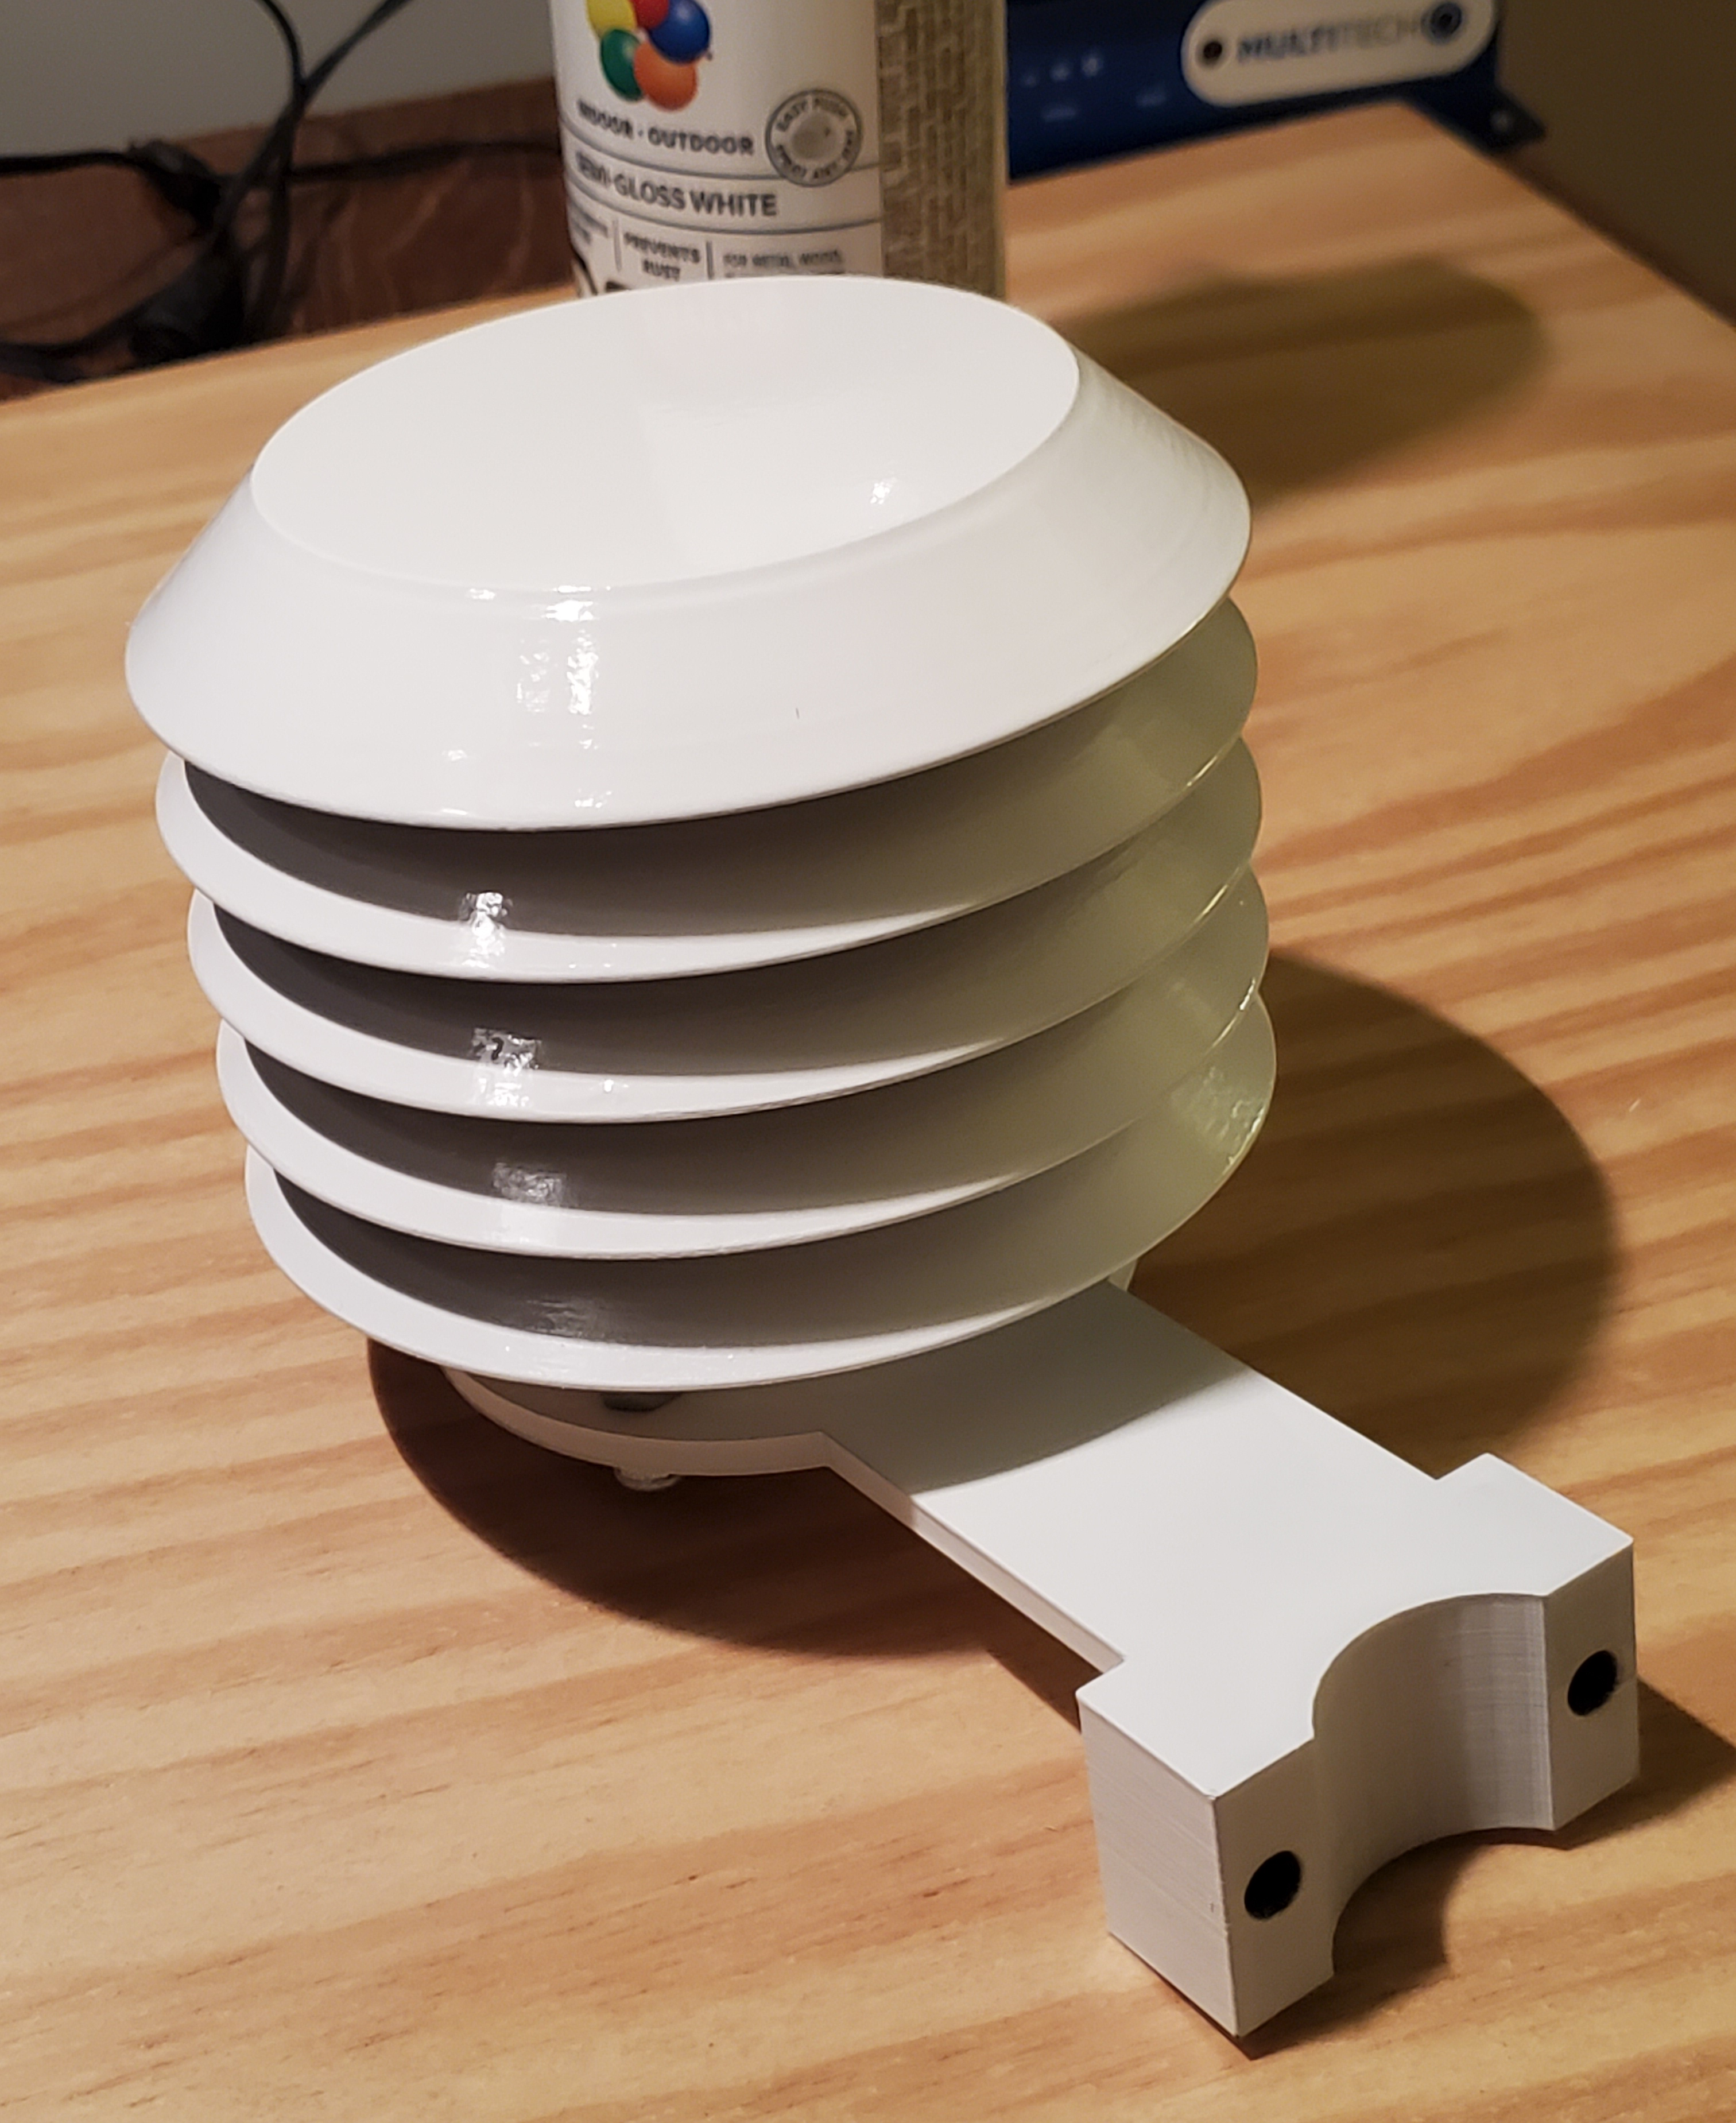
3D Printed Radiation Shield
Final Assembly
Final assembly was to pack all parts into the enclosure. The lithium ion polymer battery was hot glued to the bottom of the case then covered with two layers of electrical tape. The tape is meant to prevent the outside foil material from being damaged by the sharp solder points of the proto board mounted just above it. (I won’t make the mistake of making a hole in a LiPoly battery again).
The Cubecell comes with a 915 MHz helical antenna which I hot-glued to the enclosure’s interior side wall. The antenna’s U.fl connector attaches to the Cubecell with a push, but care must be taken to orient the antenna lead away from the RST pin header; if they come into contact the unit will reset and restart.
The circuit board is secured with a single M4 machine screw to a threaded mounting hole at the bottom of the enclosure. Cables for the solar panel and external sensors in the radiation shield are put through their cable glands and secured. All three components (solar panel, enclosure, and radiation shield) were then mounted to a sheet of plywood for outdoor testing. After the battery was charged up with an Adafruit PowerBoost 1000 via USB, the unit was moved to my snowy front yard for testing.
Cold Weather Testing
The weather station has been living outside for over 6 weeks now, enduring some bitterly cold Manitoba days. The lowest temperature recorded so far was -27.8℃ and the station continued to operate flawlessly.
There have been periods where the solar panel has received little direct sunlight either due to cloudy weather or being completely covered by snow. I estimate that the station can run about 4 days at -20℃ without solar charging before running out of power, but that still requires more testing, ideally under more controlled conditions. The solar panel does not require full sun to charge the battery, so even on cloudy days the battery is getting some top-up.
Condensation within the enclosure has not been a problem despite a wide temperature and humidity range and several openings of the enclosure lid to flash firmware updates as I was improving the arduino code running on the Cubecell. The GORE vent seems to be doing a wonderful job so far.
From a signal strength perspective, LoRa is an absolute star. I’m not even making LoRa work hard given that my weather station is less than 100 meters from the gateway antenna. Transmissions from the station at data rate 3 (DR3) with a transmit power of 20dBm are typically received at the gateway with a Received Signal Strength Indication (RSSI) of -70dBm and a signal to noise ratio (SNR) of 9, without clear line of sight. For reference, LoRa can typically demodulate a signal as weak as -120dBm or lower, which is an astronomically small signal level.
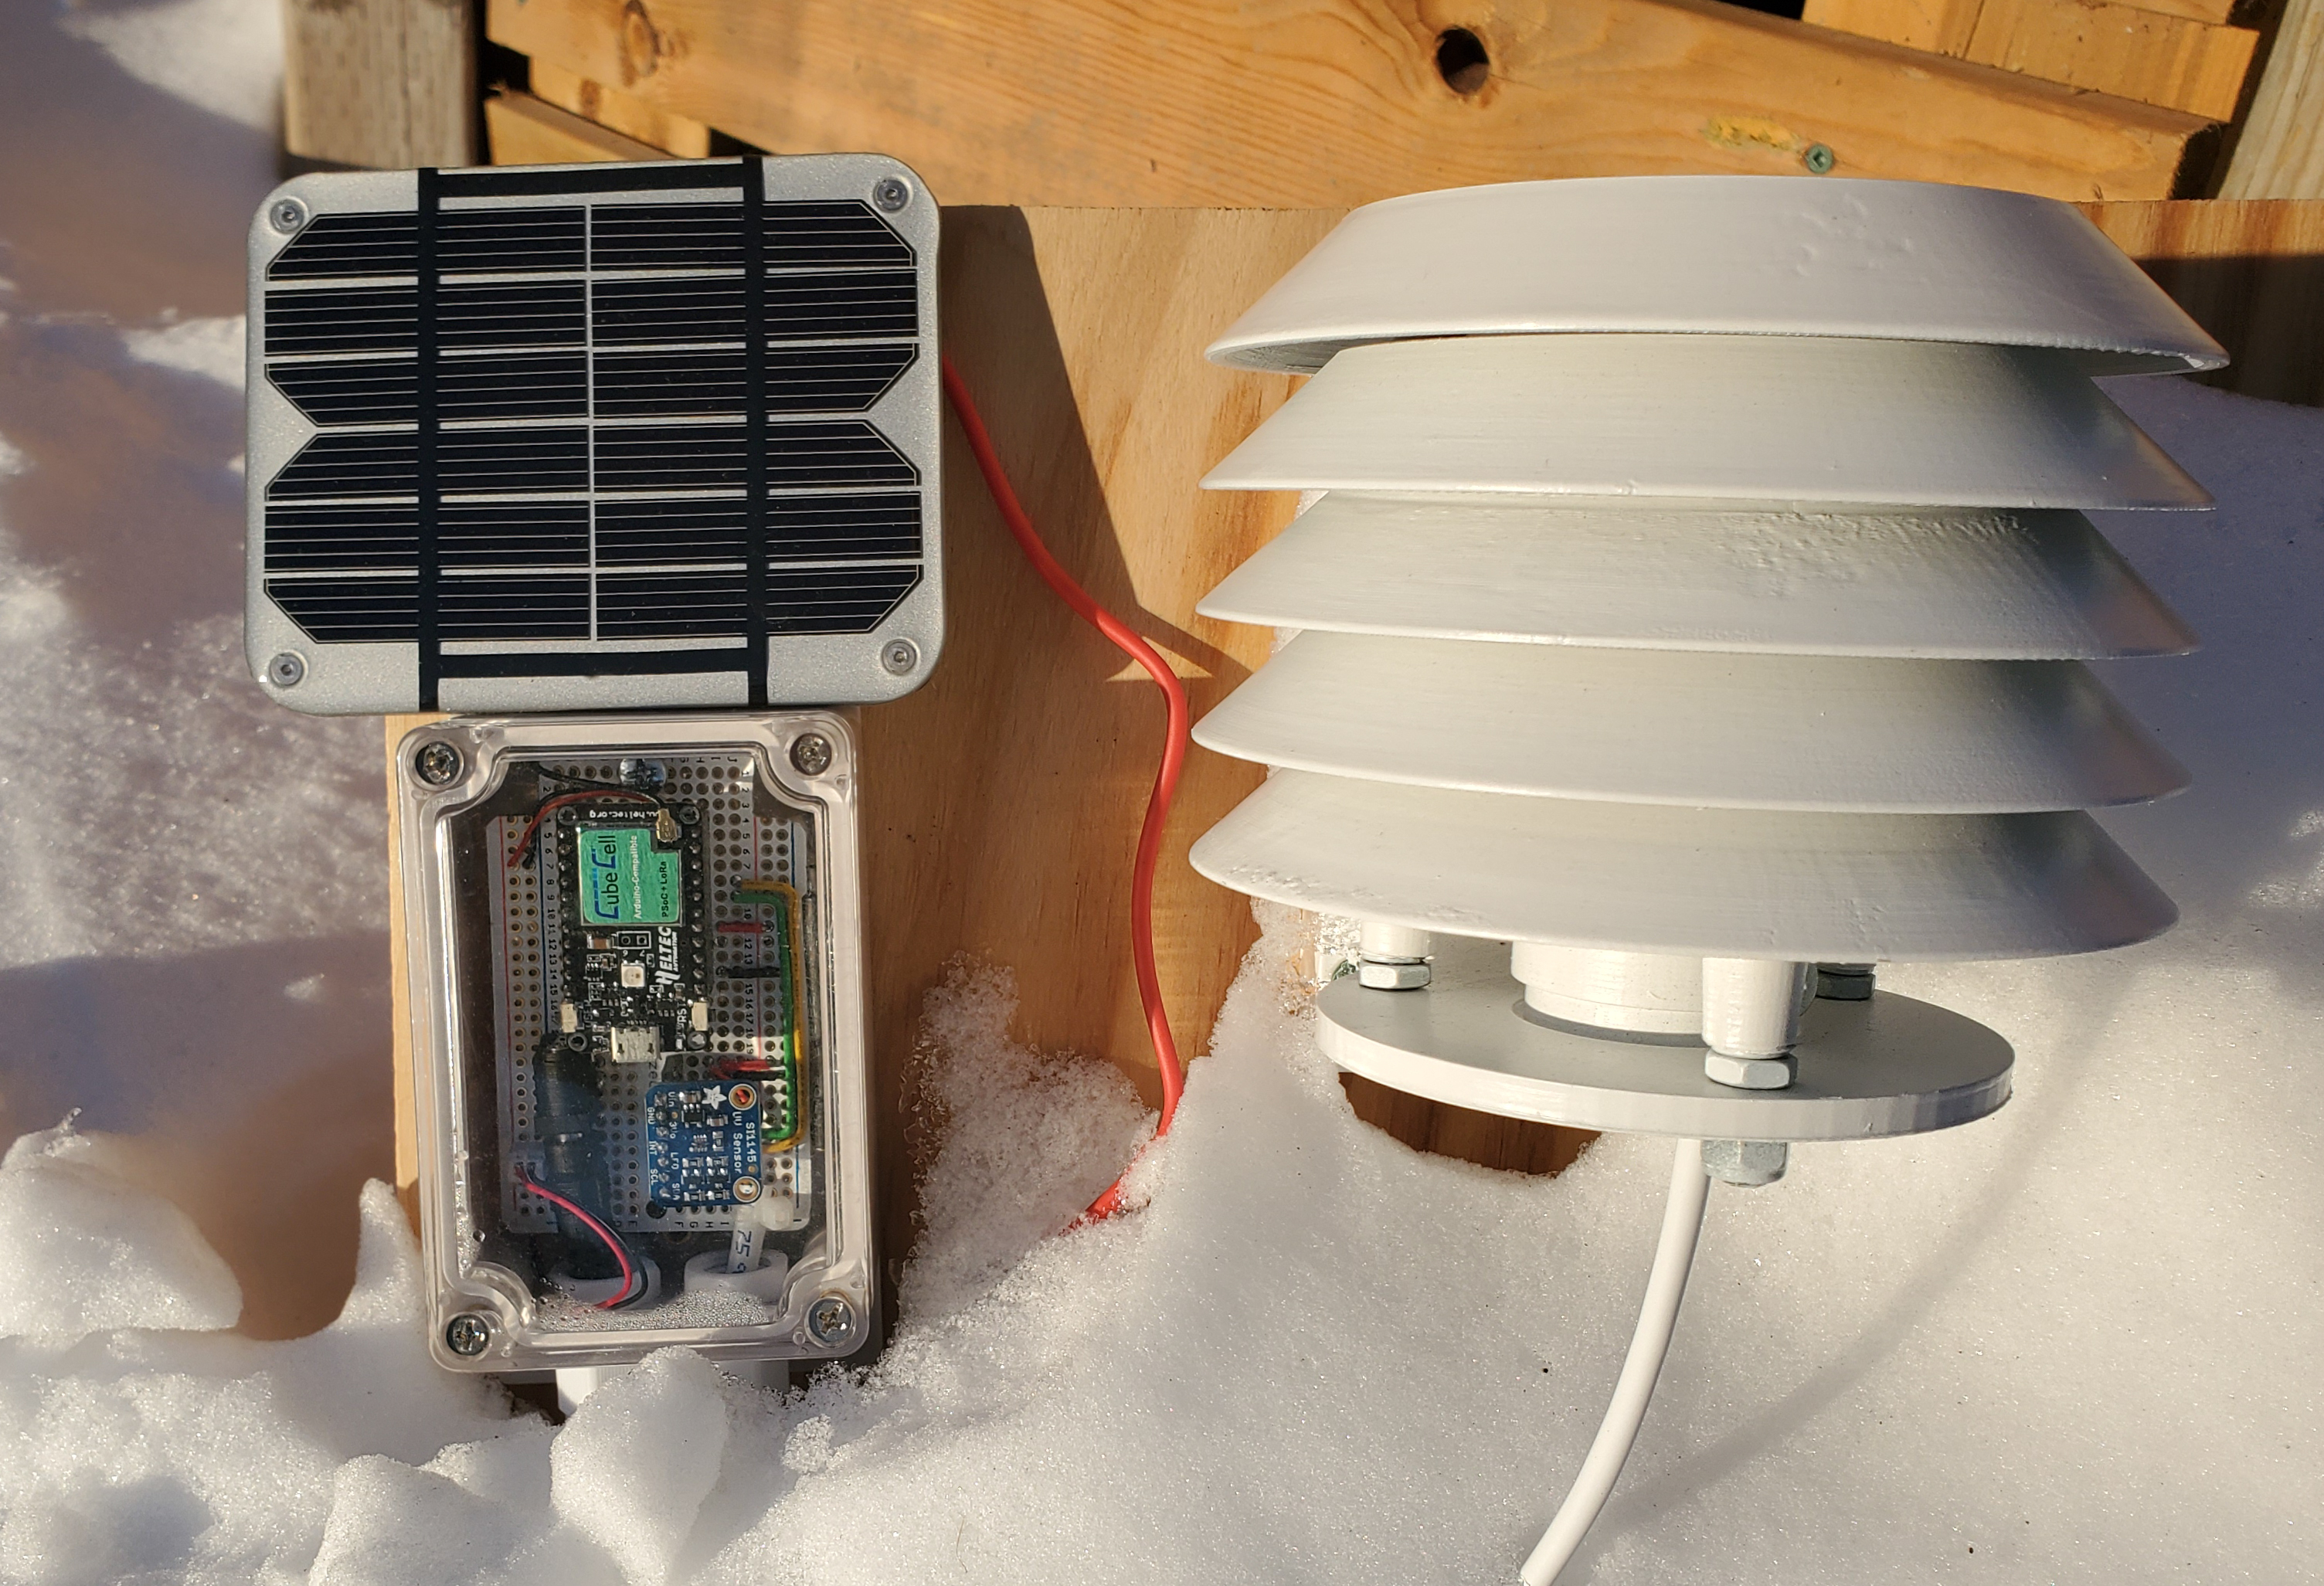
Cold weather / snow testing
Next post in this series: LoRa Solar Weather Station Part 2: LoRaWAN Gateway and Client Configuration
Inventory of parts:
List of parts used and where I purchased them (minus fasteners/tools/consumables):
Heltec Cube Cell HTCC-AB01 https://heltec.org/project/htcc-ab01/
- Plus included LoRa helical antenna
SI1145 Digital UV Index / IR / Visible Light https://www.adafruit.com/product/1777
BME680 - Temperature, Humidity, Pressure and Gas Sensor https://www.adafruit.com/product/3660
Lithium Ion Polymer Battery - 3.7V 400mAh https://solarbotics.com/product/50873/
Solar Cell: Small 6V 1W Solar Panel - Silver https://www.adafruit.com/product/3809
Flanged Weatherproof Enclosure https://www.adafruit.com/product/3931
GORE® PolyVent Standard Scrounged from the dust bin at the office (threads are broken)
Radiation shield (3D Printed): https://www.thingiverse.com/thing:1067700
Adafruit ½ size Perma-Proto Board https://www.adafruit.com/product/1609
JST Connector https://solarbotics.com/product/hvjst2/
1 x 3.8 / 1.3mm or 3.5 / 1.1mm to 5.5 / 2.1mm DC Jack Adapter Cable https://www.adafruit.com/product/2788
2.1mm DC barrel jack https://www.adafruit.com/product/373